


How to Create an EOS\/Vaulta Account: Complete 2026 Guide with AtomicHub and Anchor Wallet


If you are trying to create an EOS account today, the first thing to know is that EOS is now called Vaulta. That change alone can be confusing, especially for newcomers who are just getting started and are not sure whether they are looking at the right platform, the right wallet, or even the right name.
The good news is that the process is still very manageable. If you want a practical way to get started without getting lost in technical jargon, AtomicHub is one of the easiest places to begin. Over time, it has become more than just a marketplace for digital assets. For many users, it now works as a simple gateway into the EOS, now Vaulta, ecosystem.
In this guide, we will walk through the process step by step so you can create your account, connect your wallet, back everything up safely, and verify your account on the blockchain.
EOS is now Vaulta: What changed?
Let’s start with the part that confuses almost everyone at first.
Many people still say EOS, mostly out of habit. But the network is now branded as Vaulta. So if you see both names used across websites, interfaces, guides, and tools, do not panic. In many cases, they still refer to the same ecosystem.
What has changed most visibly is the branding. What has not necessarily changed is the underlying experience of creating an account, using a wallet, and interacting with blockchain tools. Think of it this way: the name may be new, but much of the infrastructure still feels familiar.
That is why the smartest approach is to focus less on the label and more on the actual steps you need to complete:
create the account,
connect the wallet,
confirm permissions,
and verify that everything works.
Why use AtomicHub to get started?
If you have spent any time around tokens, NFTs, or Web3 platforms, you have probably come across AtomicHub already.
While many people know it as a marketplace, AtomicHub has gradually become a much more useful entry point for blockchain users in general. Its interface is often easier to understand than other, more technical onboarding paths, which makes it especially helpful for beginners.
Another reason it matters today is that the platform has evolved, especially with the involvement of Facings Inc. That means you are not dealing with an outdated environment, but with a platform that has been refreshed and adapted over time.
For new users, that makes a real difference. A clear interface can save you time, reduce mistakes, and make the first contact with the EOS/Vaulta ecosystem much less intimidating.
What You need before You start
Before jumping in, it helps to have a few basics ready.
You can start either from a desktop computer or a smartphone, depending on what is more convenient for you. In either case, make sure you have:
a stable internet connection,
a digital wallet,
enough time to follow the steps carefully,
and extra attention when entering account names or approving permissions.
The process does not take long, but it is important to be precise. Small mistakes, especially when dealing with wallets and account credentials, can create unnecessary problems later.
Step-by-Step: How to create an EOS/Vaulta account with AtomicHub
1. Go to AtomicHub
Start by opening the AtomicHub website.
Once you are there, look toward the top-right corner of the page and find the option labeled “Create Wallet.” This is where the setup process begins.

Do not rush. Make sure you are clicking the correct option before moving forward.
2. Choose the Wallet You want to use
After clicking the button, you will see a screen asking you which wallet you want to use.
The available options may vary depending on your device and operating system.
You might see choices for:
mobile wallets,
browser plugins,
or desktop wallets.
In this case, if you are working from a desktop computer, a common choice is Anchor Wallet.

Anchor is one of the best-known wallets in the EOS ecosystem, and it is particularly useful if you want a more guided setup experience.
3. Approve the required permissions
Once you have selected your wallet, the next screen will usually ask you to grant the necessary permissions.
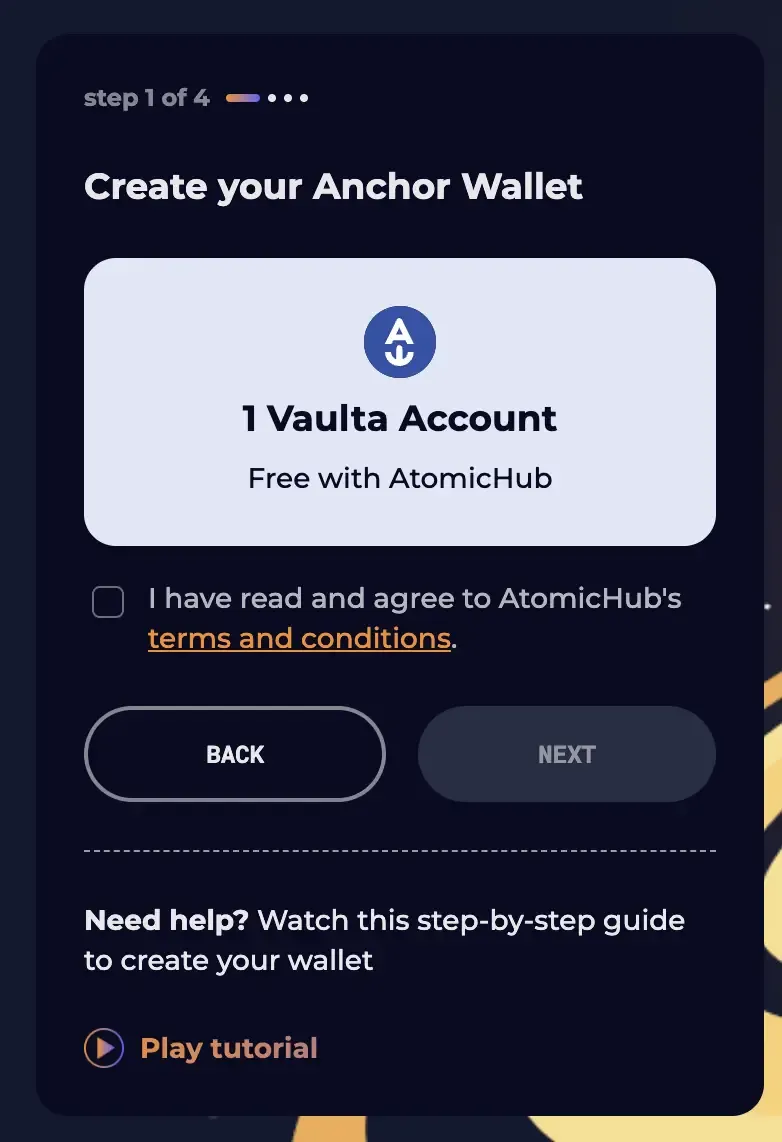
This is a standard part of the process. It allows the wallet and the platform to communicate correctly so the account can be created on-chain.
Read each prompt carefully before approving anything. Even when the steps are simple, it is always a good habit to check what you are accepting.
4. Complete the captcha verification
At the next step, you will be asked to complete a Captcha.
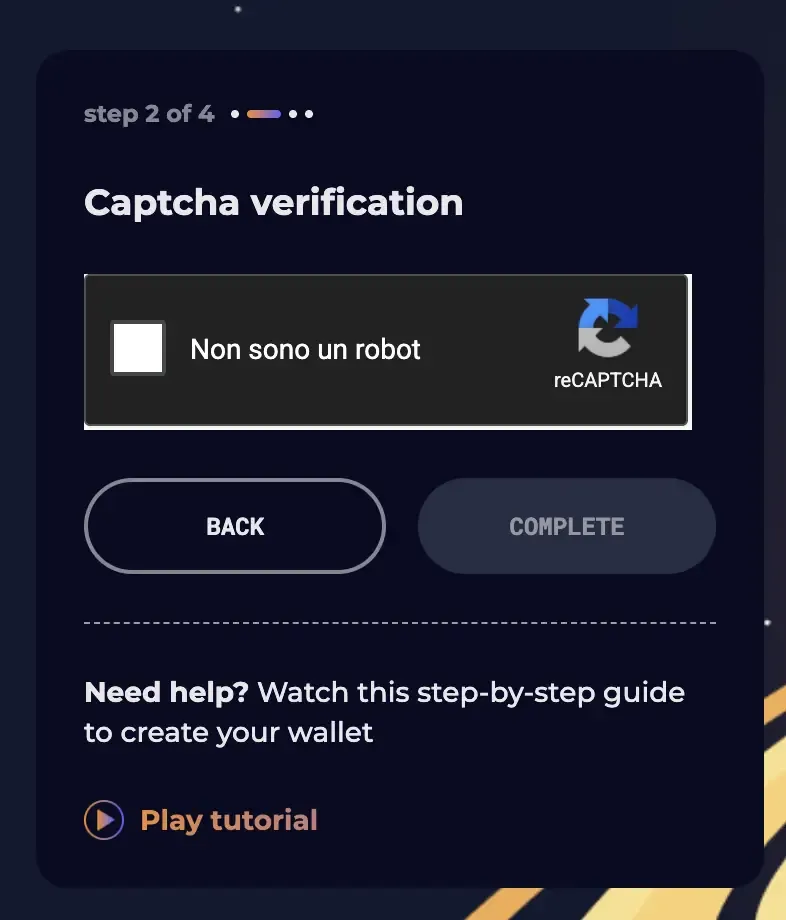
This is there for a very practical reason: it helps block bots and automated abuse during the account creation process. In other words, it protects the onboarding flow and makes sure real users are the ones creating accounts.
Once the Captcha is completed successfully, you can move on.
5. Download and install Anchor Wallet
Now it is time to install the wallet on your device.
If you selected Anchor Wallet, download it and install it just as you would with any normal desktop application. Once the installation is complete, open the program so you can continue the setup directly from within the wallet environment.

At this stage, AtomicHub may show a button like “Launch Anchor on this device.” Clicking it should trigger a small prompt asking you to open the process with Anchor on your computer.
Creating the EOS account with Anchor Wallet
Once Anchor is installed and opened, the actual account creation process becomes much more straightforward.
6. Initialize the Wallet
Before anything else, you will need to initialize your wallet and set an access password.
This password is important because it protects access to your wallet on that device. Choose something secure, store it safely, and do not rely on memory alone.
Once the wallet is initialized, you can continue with the guided steps for creating your EOS account directly on the blockchain.
7. Choose Your account name
Now comes one of the most important parts: selecting your account name.
When creating an EOS account, the name must follow specific rules. In this case, you can use:
lowercase letters,
and numbers from 1 to 5.
In some cases, the system may also allow you to generate a random name automatically if you do not want to choose one manually.
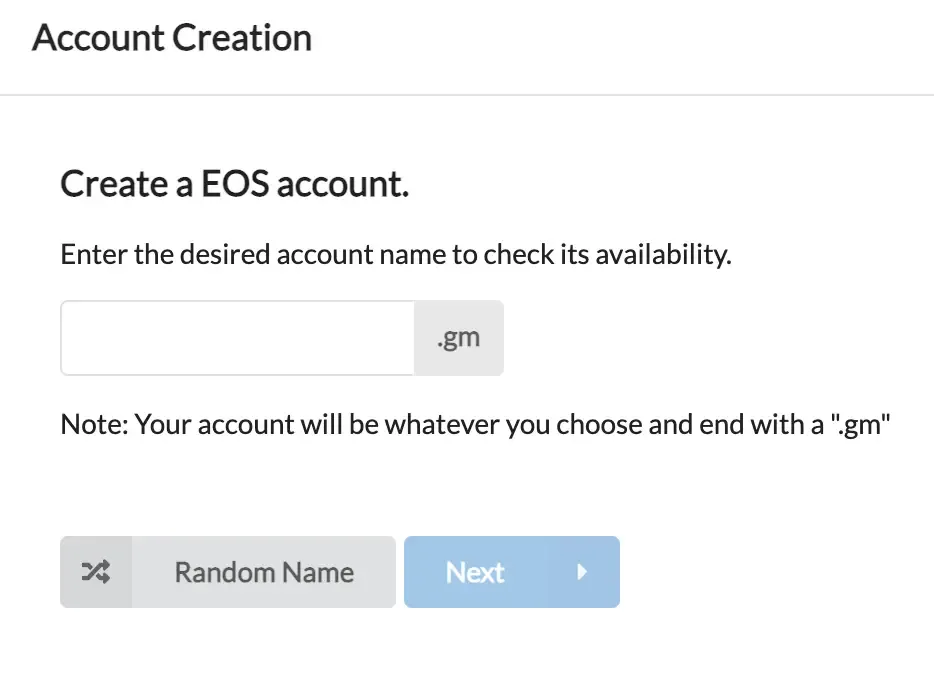
A useful detail to notice is that the account created through this flow may end with `.gm`, which is associated with GreyMass, the team behind the Anchor wallet.
8. Confirm the account creation
Once you have picked your account name, continue to the next step and click “Create.”
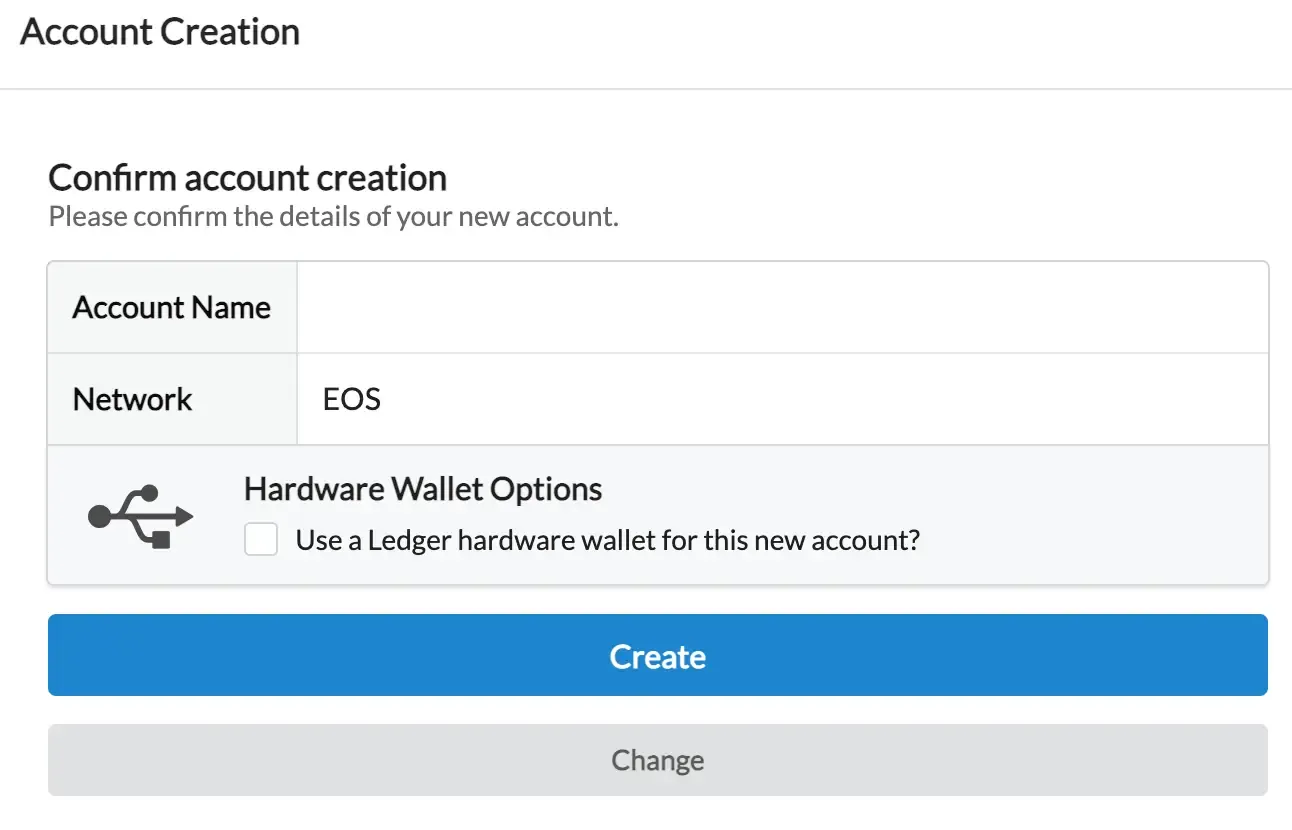
At this point, Anchor will likely ask you to unlock the wallet using the password you set earlier. Enter it carefully and confirm the action.

After that, the system will process the request. Usually, it only takes a few seconds for the account creation to complete.
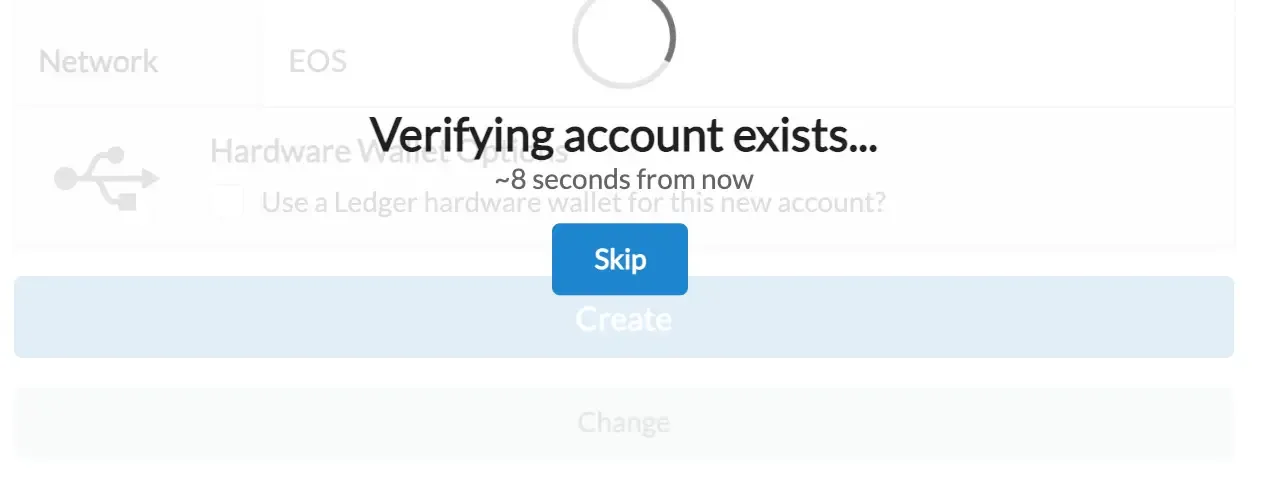
When the process finishes successfully, your new account will officially exist on the EOS blockchain.
Back up Your EOS account immediately
Creating the account is only half the job.
The next essential step is to back it up properly. If you skip this part, you risk losing access to your wallet or your account information later.
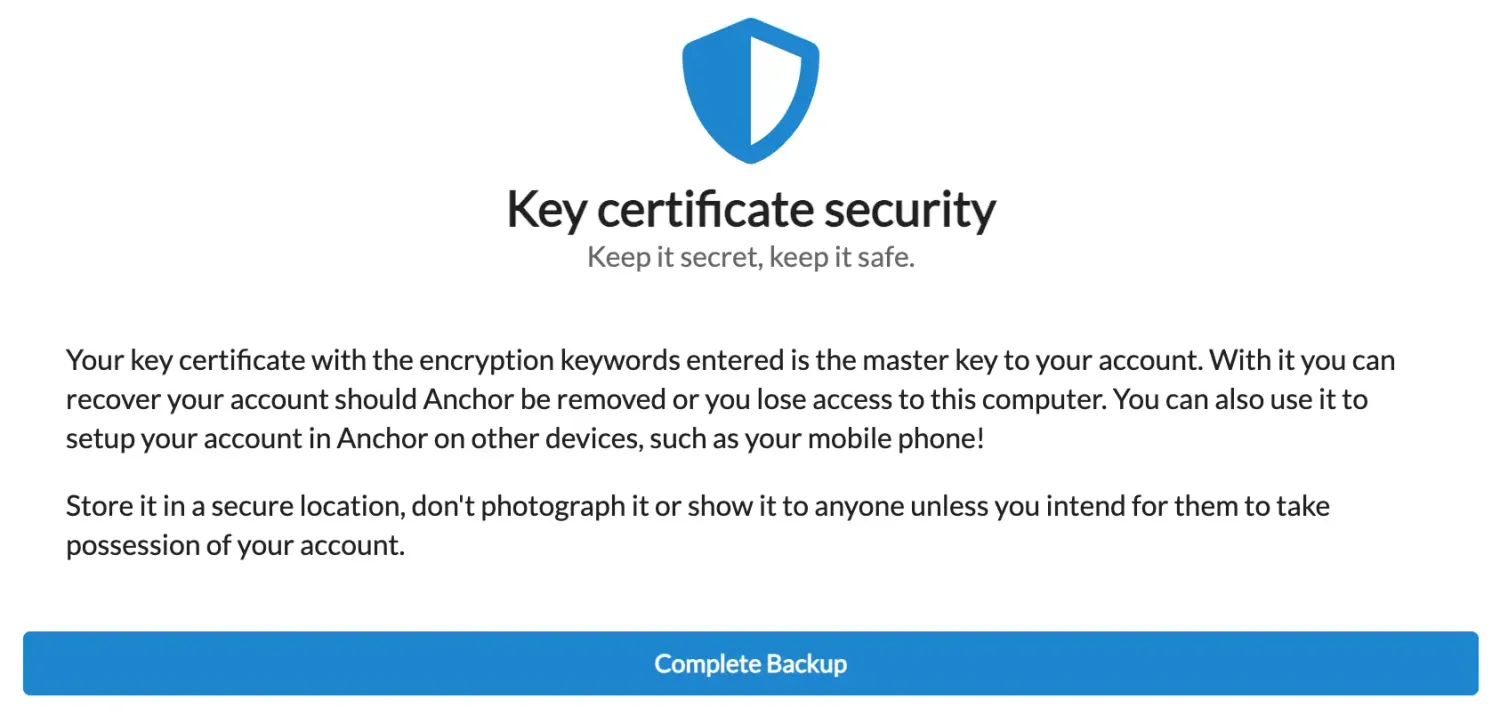
9. Create a backup file
Anchor includes a backup feature that makes this easier.
After clicking “Create Backup,” the wallet will generate a file that helps protect your account keys and recovery information. This file should be saved carefully, and ideally also printed or stored in a secure offline location.
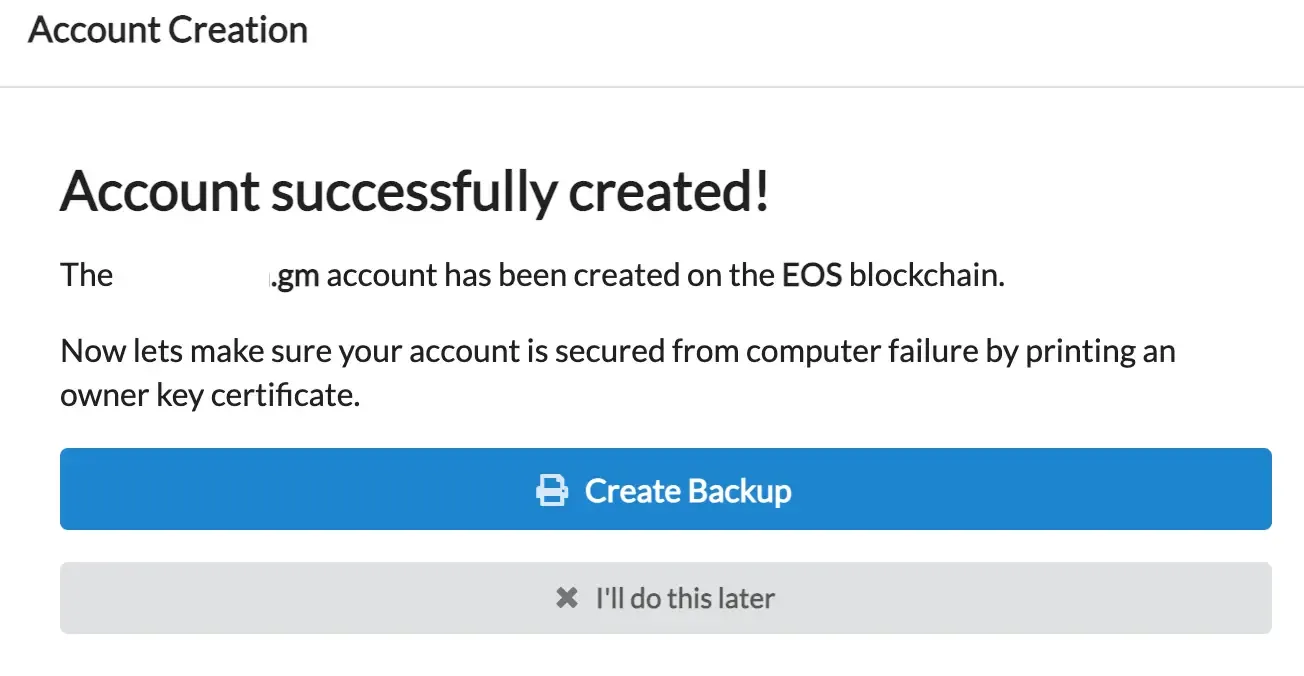
Do not treat this as optional. In blockchain systems, backups are often the only thing standing between you and permanent loss of access.
10. Write down the recovery words
During the backup procedure, you will be shown a set of recovery words.
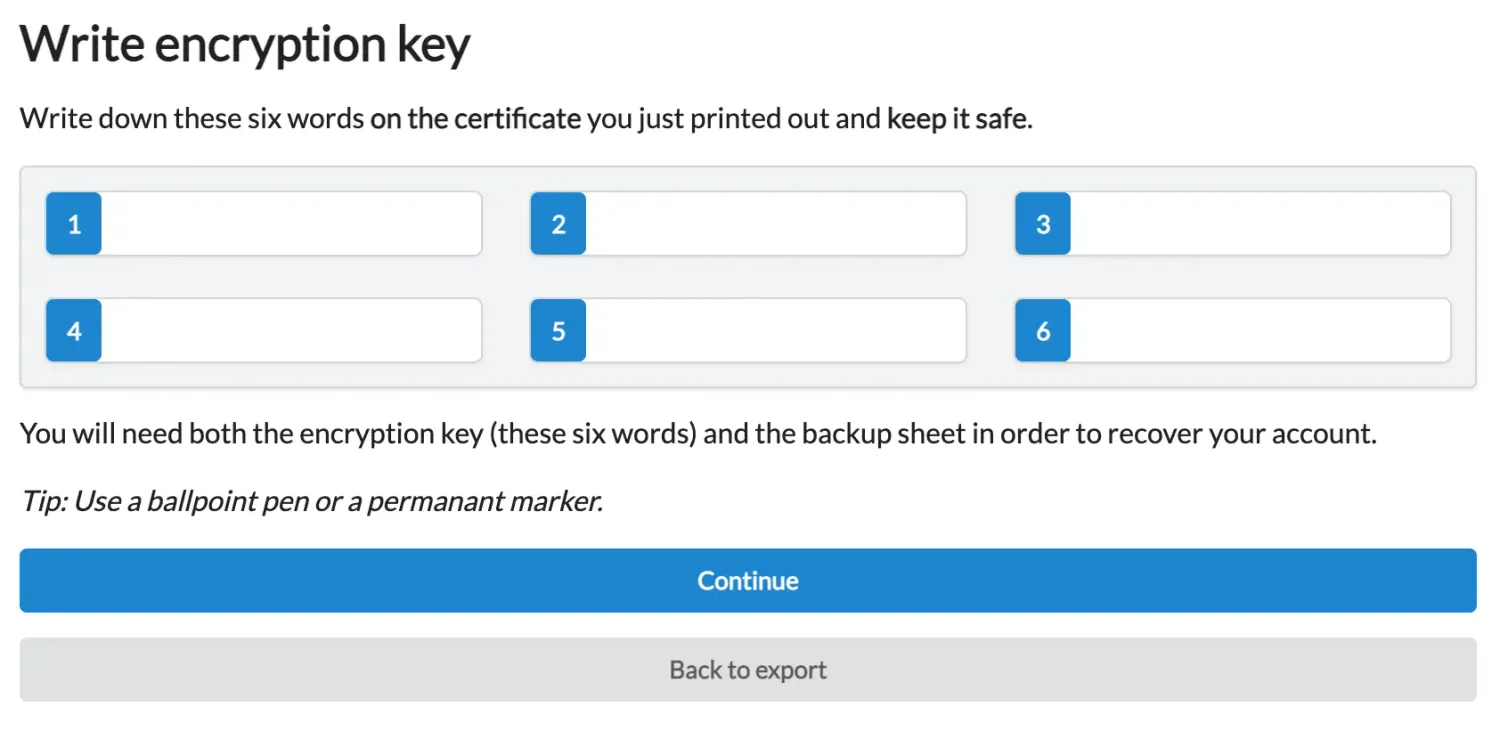
These words are extremely important. They are what allow the wallet backup to be unlocked and restored if needed in the future.
Write them down carefully and exactly as shown. Pay attention to:
spelling,
order,
and completeness.
In the next step, the wallet will typically ask you to enter those words again in the correct order. This is a verification step to make sure you have saved them correctly.
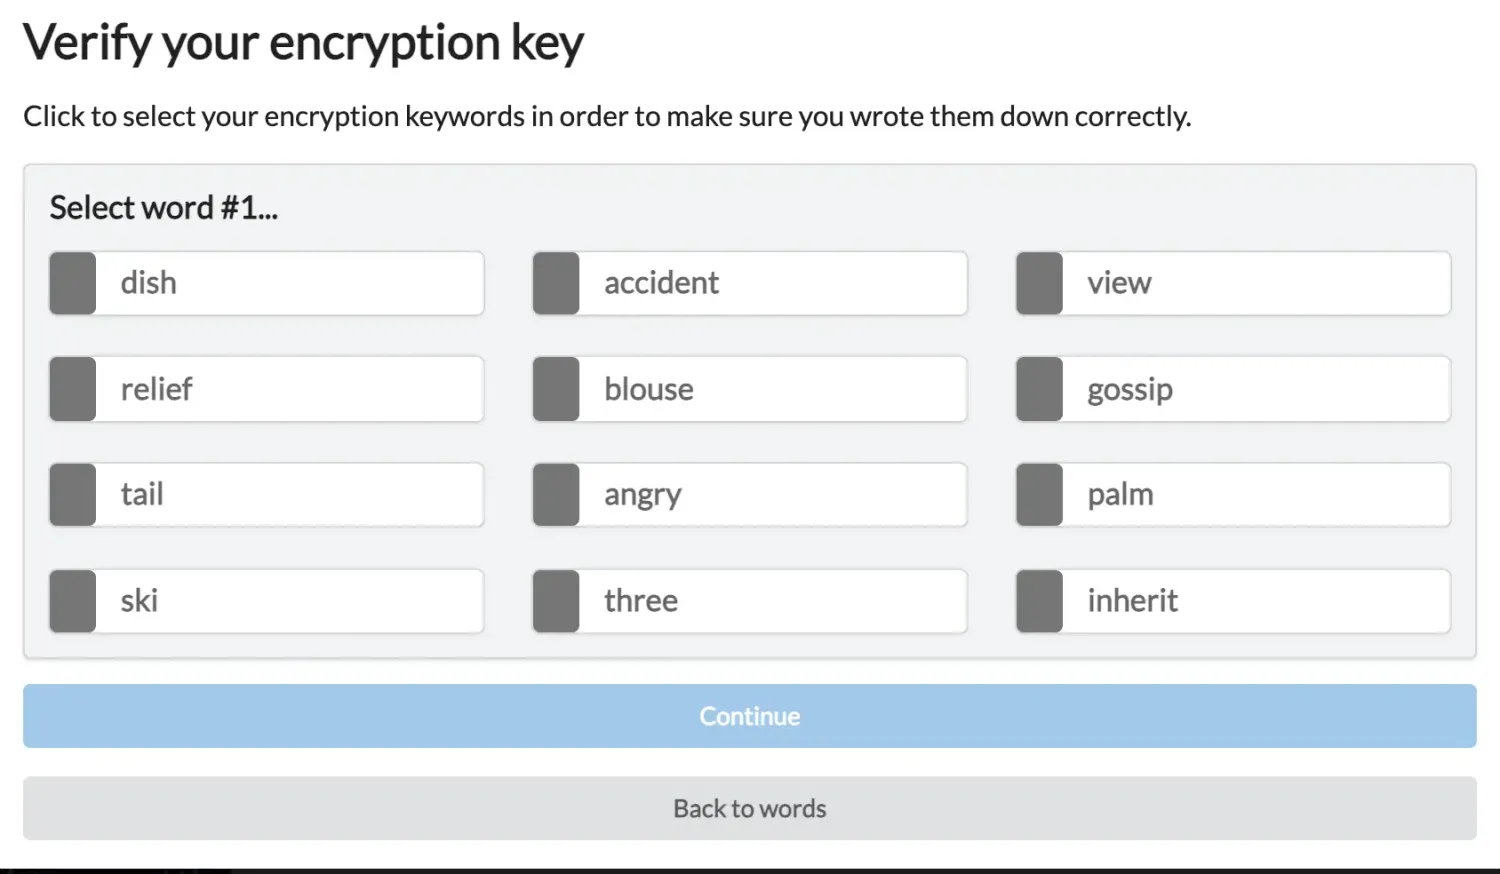
11. Store everything safely
Once the backup process is complete, you will have a file and a set of recovery words that must be protected.
This matters because without those 6 recovery words, nobody will be able to recover the private keys and information linked to your EOS account. Not the wallet provider, not the platform, and not the blockchain itself.
That is why your backup should be:
stored safely,
kept private,
and ideally saved in more than one secure location.
How to check Your EOS account on the Blockchain
After creating and backing up your account, the final step is to verify that everything is there and working as expected.
To do that, you can use a block explorer.
A block explorer is simply a tool that lets you view blockchain data such as:
account details,
transactions,
available resources,
and memo activity.
One example is vaultascan. To use it, just go to the search bar in the top-right corner and enter your account name.

Once you do that, you will be able to see the public information linked to your account.
This may include:
your account resources,
transaction history,
movements involving the account,
and any messages attached through memos.
If the account was just created, some resource values may still appear as 0, which is normal at the beginning.
Why this guide matters for beginners
For people who have never used blockchain tools before, the hardest part is often not the process itself. It is the feeling of unfamiliarity.
New terminology, digital wallets, permission requests, unusual account names, and different interfaces can make the whole experience feel more complex than it really is. That is often why beginners hesitate.
A clear guide changes that.
When the process is broken down step by step, it becomes much easier to understand what is happening and why each action matters. That is exactly why a practical tutorial is valuable: not because it removes all complexity, but because it makes the complexity manageable.
AtomicHub helps with this because it offers a more accessible entry point, especially now that the platform feels more updated and refined. For newcomers, that can make the difference between giving up and getting started.
Final thoughts
Creating an EOS account, or rather a Vaulta account today, is not as difficult as it may seem at first.
Once you begin, the path becomes much clearer:
you open AtomicHub,
choose your wallet,
install Anchor,
create the account,
back it up,
and verify it on the blockchain.
Step by step, the process starts to make sense. And after that first login, everything that follows becomes much easier to understand.
If you are approaching Web3 for the first time, AtomicHub can be a solid place to begin. And if you want to go deeper into the EOS ecosystem, you can also explore “Mastering EOS — Practical Guide for Beginners and Advanced” by Alfredo de Candia, which covers these topics and more. The book is available for free on Amazon for Kindle Unlimited subscribers, and you do not need a Kindle device to read it.
In short: the name may have changed from EOS to Vaulta, but with the right guide and the right tools, getting started is still entirely within reach.

nft, hoken tech, blockchain, cryptoart, eos, nft art, artificial intelligence, ai, watch authentication, crypto artist, nfts, web3, nft game, web3 game, videogame, nft distributor, videogame blockchain

